


Supports all over the place 

Clip too close to the bracket. Added some material for the next print.
I have always been a DIY type. As I get older, I am finding it more and more attractive to pay someone to do the once DIY things I would do. Of courde, there are exceptions.
In January I bought a pretty decent 3D printer to start making things for my wifes home bakery business as well as small things I can use or sell. The latest are the plastic clips that hold hockey sticks to the wall on a rack.
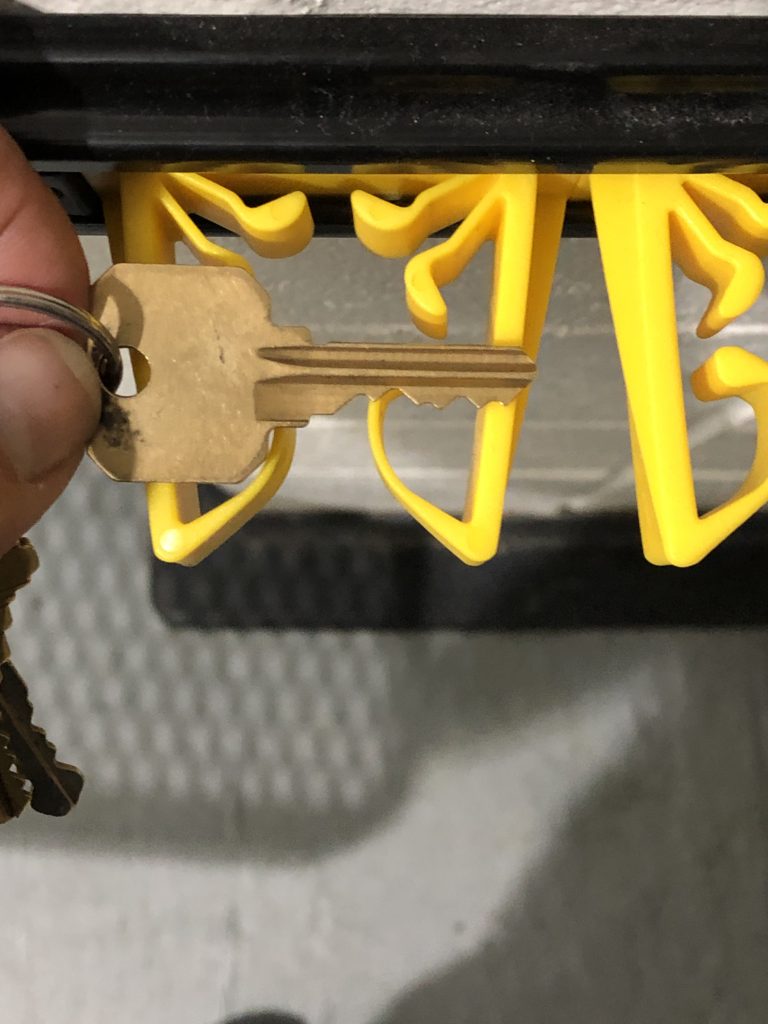
The rink where I play, has them in front of most locker rooms. The other day, I took a bunch of pictures and used my key for a size reference. I managed to sketch out the basic shape of the clip in Illustrator and then model it in TinkerCad.
Rather than just buy the clips and track, I figured I would go the DIY route. My plan was to model the clip portion – get it right then model a way for the clip to slide into superstrut. Superstrut is the metal the electrical breaker panels are bolted to so they slide back and forth in an earthquake. They are inexpensive and readily available at Lowes or Home Depot for about $15 for an 8 foot length.
The initial print had zero real world measurements. I was able to cobble together some of the measurements from the known width of the key and transfer to the model. Sadly, the pictures were at an angle and measurements were off. This print was way too thick and too tall.
The second print was almost half the height and it looked much better. There was still a lot of stress on the back plate when a hockey stick was clipped in so I made the clip a bit narrower. With this modification, the “fingers” were a bit more flexible but it still wasnt right.
My son had a late game so I took my caliper with me to take some measurements. After applying the new measurements to the model, the clip portion was 99% perfect. I now had to model the back part to slide into superstrut.
Print number 4 had the back portion added so I could slide the clip in the channel. Well, it seems my measurement was way off and I ended up taking off 4.5 mm with the grinder. After the field mod, the clip slid in! It took an additional 1.5 hours to print due to supports for the over hangs. I hate overhangs and supports. The layers always look like shit on top of the supports and I really did not want to sit there and pluck away all of the support material for all 20 of these things so I separated the back and clip portion and modeled in holes for screws.
I do not like the way the clip is sitting so I decided to push it away an additional 5 mm from the bracket. I added the 5 mm to the back of the clip and then removed the 4.5 mm from the back portion and printed number 5.
Right before I went to bed, the print finished. I went out in the garage to see if it would easily attach….almost. I need ot remove maybe 1mm from the back portion and I have a final release!